 Recently, I have had a few requests for a ‘How To’ configure the TVheadend server. This article will cover off on the basics to get you up and running. If you want to review the hardware requirements then check out the build post here. When you first open TVheadend via your web browser it can be a bit overwhelming which settings to choose. I have broken it down below into the ‘wizard’ setup and then some manual configuration. I have also listed the steps involved to stream the feed onto the internet so you can view externally!
How to configure TVheadend via the wizard
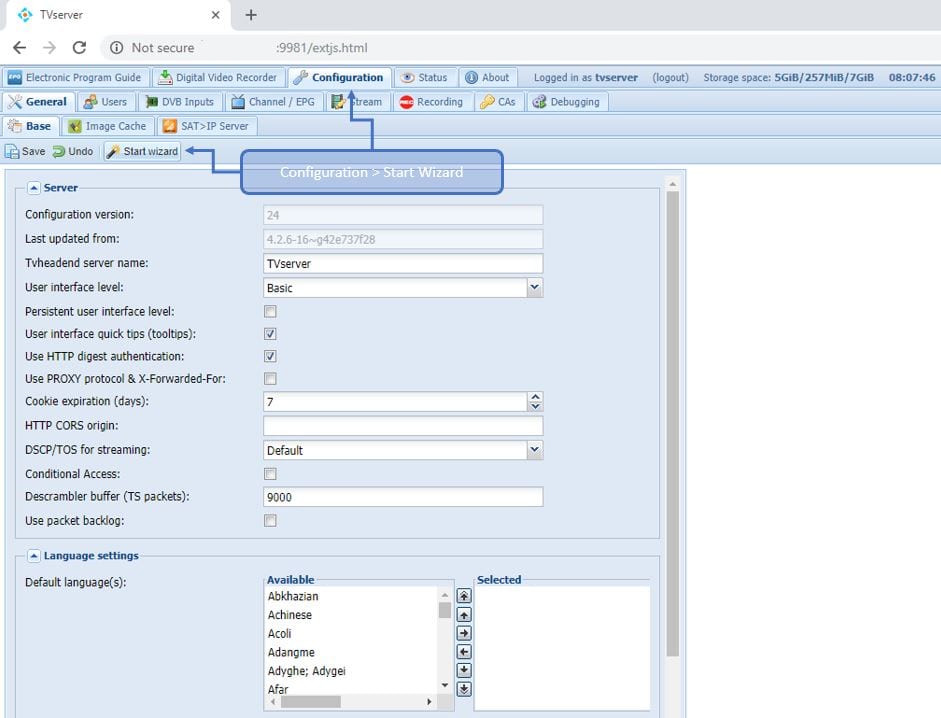
If you are unsure how to get to the web GUI for TVheadend, I would suggest a quick review of this post. Particularly looking at step 3. In a nutshell, you need to use a web browser to configure TVheadend. Go to the IP address you set on your device. If it is your first-time use, you will not get a login screen, however, you should get the wizard to come straight up. If for some reason you canceled the wizard, you can find it by clicking ‘Configuration > Start Wizard’
Open up a web browser and enter the IP address of your TVheadend Server. Also, use the port number ‘9981’. (For example http://192.168.1.168:9981) This will bring up the TVheadend Web GUI. On the first startup, you will be presented with the setup wizard.
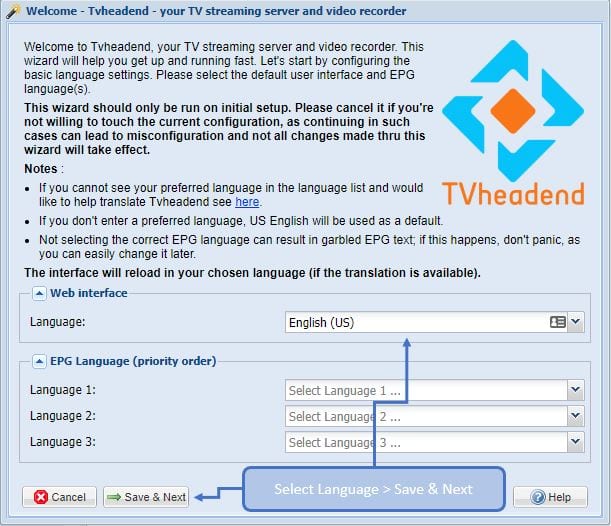
Select the web interface language and the EPG language if different. In most cases, you will only need to select the web interface language. Click next.
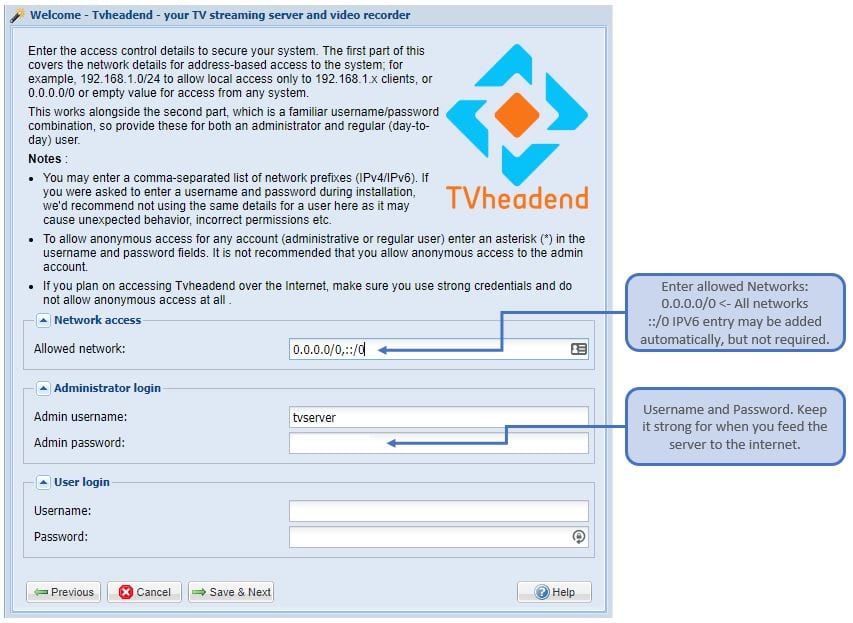
This section allows you to set ‘allowed’ networks to use the server. You can insert 0.0.0.0/0 to allow all networks, or you can use something like 192.168.1.0/24 to allow anything on that network to access the server. This is a personal preference. You might also notice an open IPV6 entry separated by a comma. This is also acceptable. You can add multiple networks this way. Add an admin login, keep this super strong, especially if you plan to stream content via the internet. If you plan to allow other users into the network, then set them up here also.
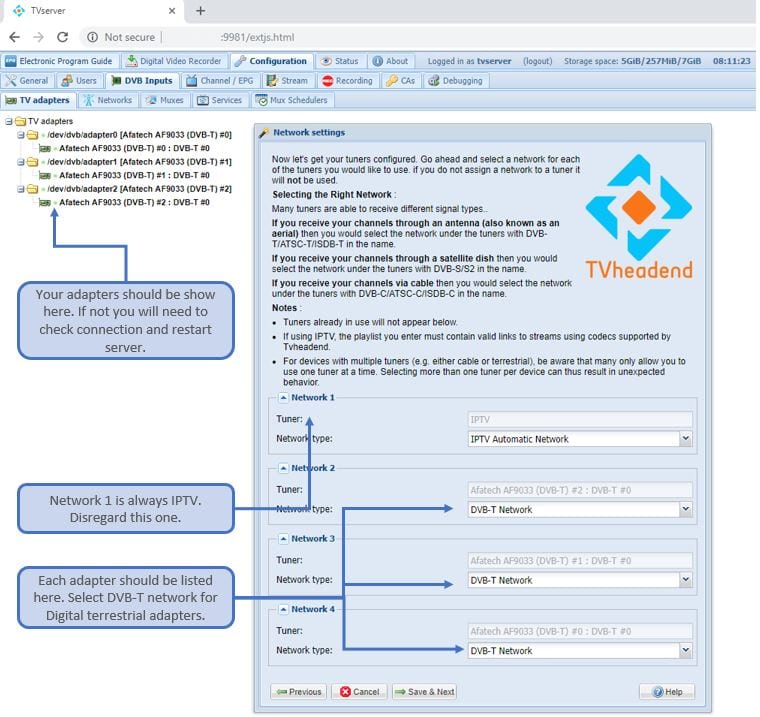
The next section will give you an insight into how many adapters the server has picked up. You should see all of them plugged in. If not, then check your connection to the tuner (USB) and ensure the RPi operating system has loaded the drivers. Some TV tuners may not be picked up by Linux. Network 1 always defaults to IPTV, disregard this and continue to your adapters/tuners. Assign each adapter to a network. In my case, it is DVD-T which is Digital Terrestrial TV in Australia.
Because terrestrial television is transmitted on different frequencies dependant on your location, you need to select a profile that matches the location you are in. This will tell the tuner to look at these frequencies. Go ahead and select the correct profile for your area.

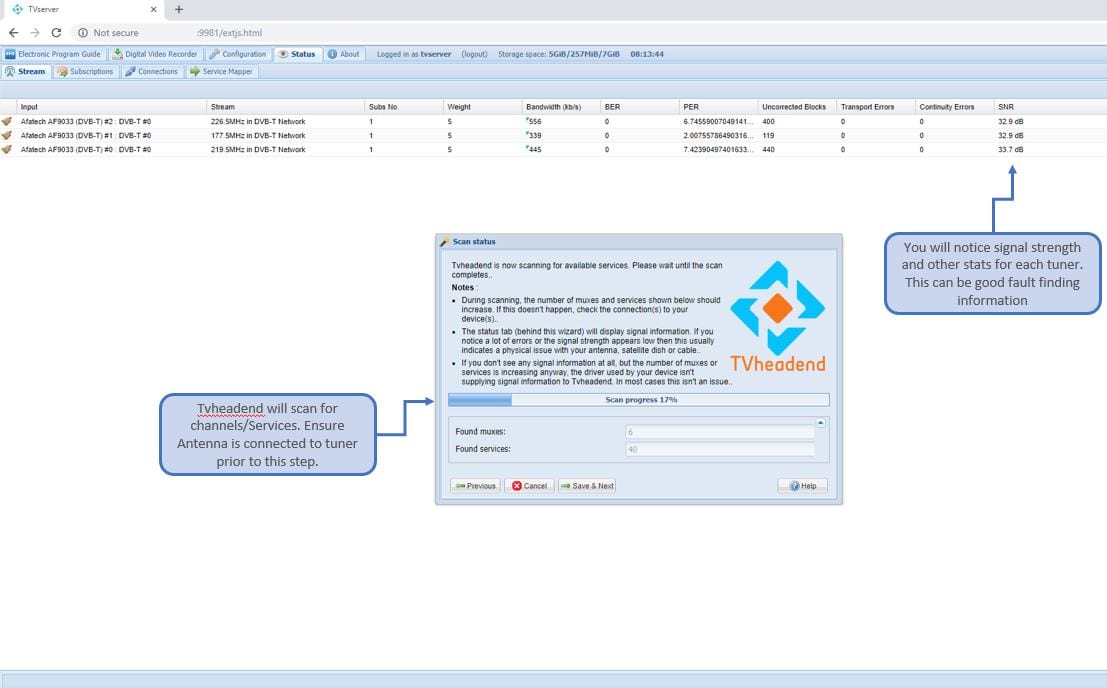
This next screen will begin to scan for all services available for the area that you selected. If you accidentally select the wrong location, then you may run into issues. Also, ensure that your TV antenna is connected at this stage. Some of the tuner details can be found in the window behind the wizard. We can revisit this screen later to fault find signal quality issues.
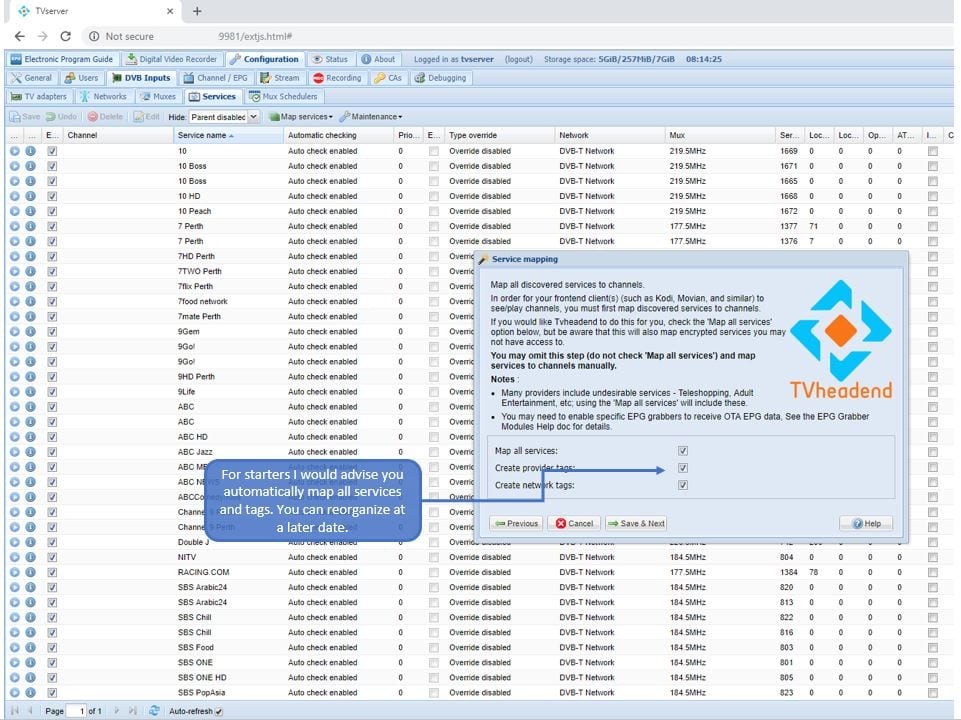
Now that we have found the desired TV channels, we need to map out all the tags and channel names/numbers. This can be done automatically by selecting the 3 check boxes. It is possible to re-sort these at a later date. For now, it is easier to allow TVheadend server to sort it out.
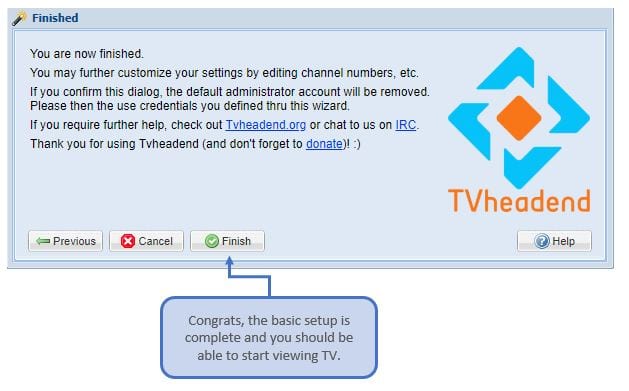
Congrats, your server is now set up! Be it at a basic level, you should now be able to consume some IPTV. The next section will cover off on some ways to do this!
Watch a stream with VLC
Now that you have done all the hard work, its time to consume some IPTV. This section will outline how to view a channel with VLC. If you have not downloaded VLC, then you will need to do this first. https://www.videolan.org/ For those of you who are not aware, VLC is a media player that is very popular and compatible with a LOT of different media types. We can use VLC media player to open our TVheadend streams.
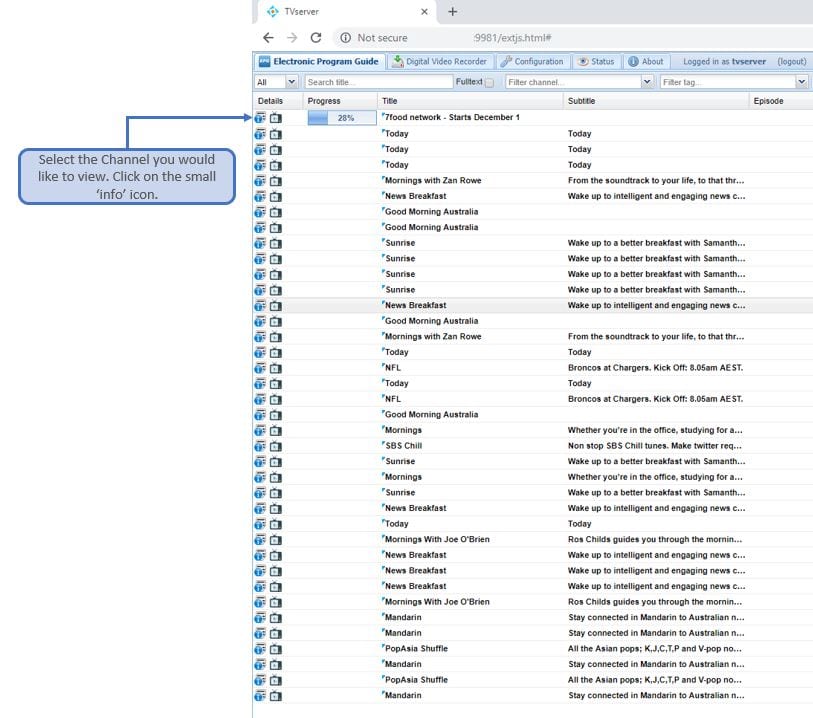
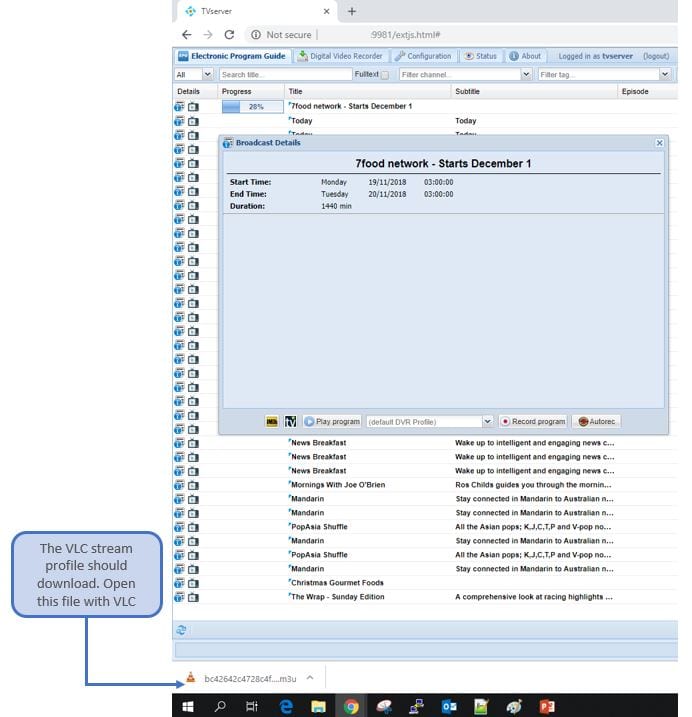
Open up the TVheadend web GUI and navigate to the channel you want to watch. Click on the small ‘info’ button on the left-hand side of the screen. This will open up a modal window with which you can grab the stream.
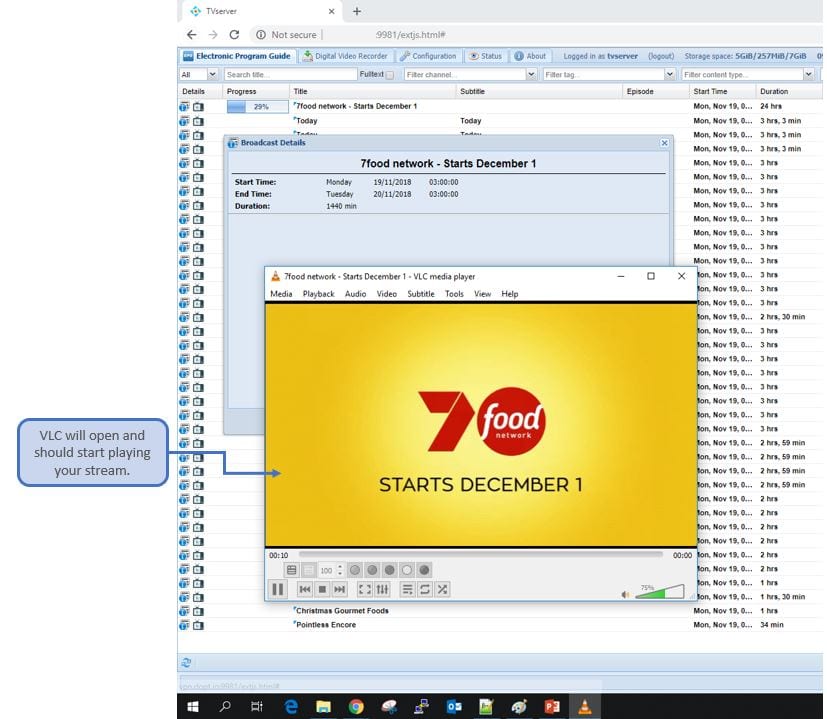
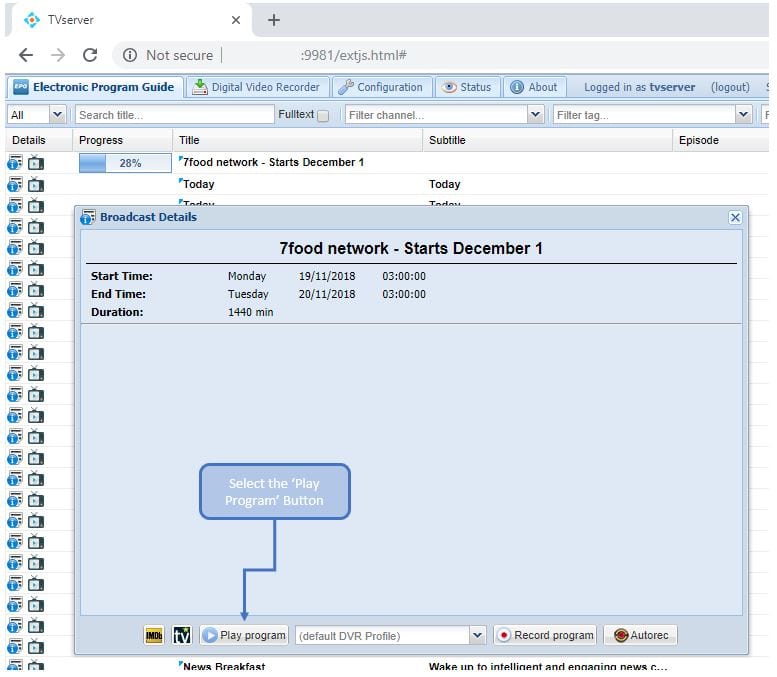
Select the ‘play program’ button. This should initiate a download. This file is basically a .m3u which can be opened by VLC. VLC will then be pointed directly to the stream you selected.
Open the downloaded file with VLC.
Your stream should then begin to play in VLC.